Clothes Pin Mary Joseph and Baby Jesus Ornament
This page may contain affiliate / referral links. See Disclosure for more info.
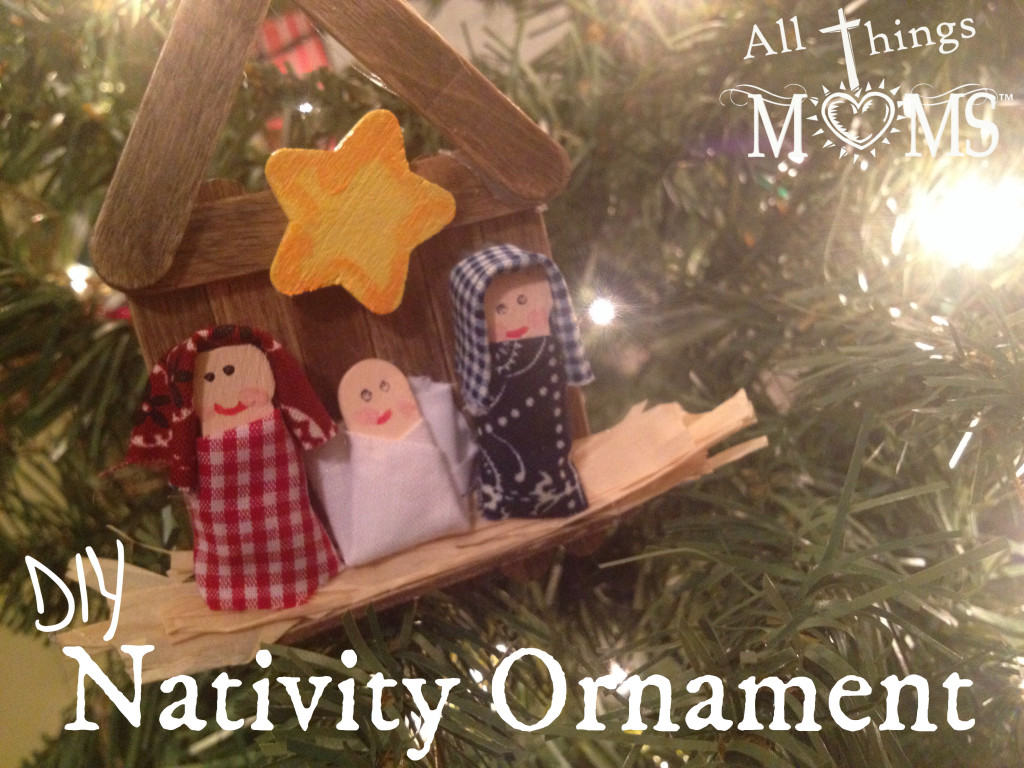
We've been making these Nativity ornaments this week to raise money for clean drinking water for Christmas. (You can read the full story in my previous post.) We have made a LOT of these ornaments in the past week and so far everyone has loved them so we thought we'd share how we made them!
We being me and my 5 year old daughter, the one who started it all with her faith for God to provide water for an entire family overseas. She's got a faith so big that I almost forgot she was still just a little girl. Then she fussed at me for putting Joseph's clothes on Mary, LOL. I couldn't see the difference but it was clearly in their eyes. oops.
Anyway, aside from that one little mishap on my part we've had such a fun time putting these nativity scenes together! She did all the painting herself, and has taken great pride in picking out clothes for each Mary and Joseph. I hope you have a great time putting yours together too!
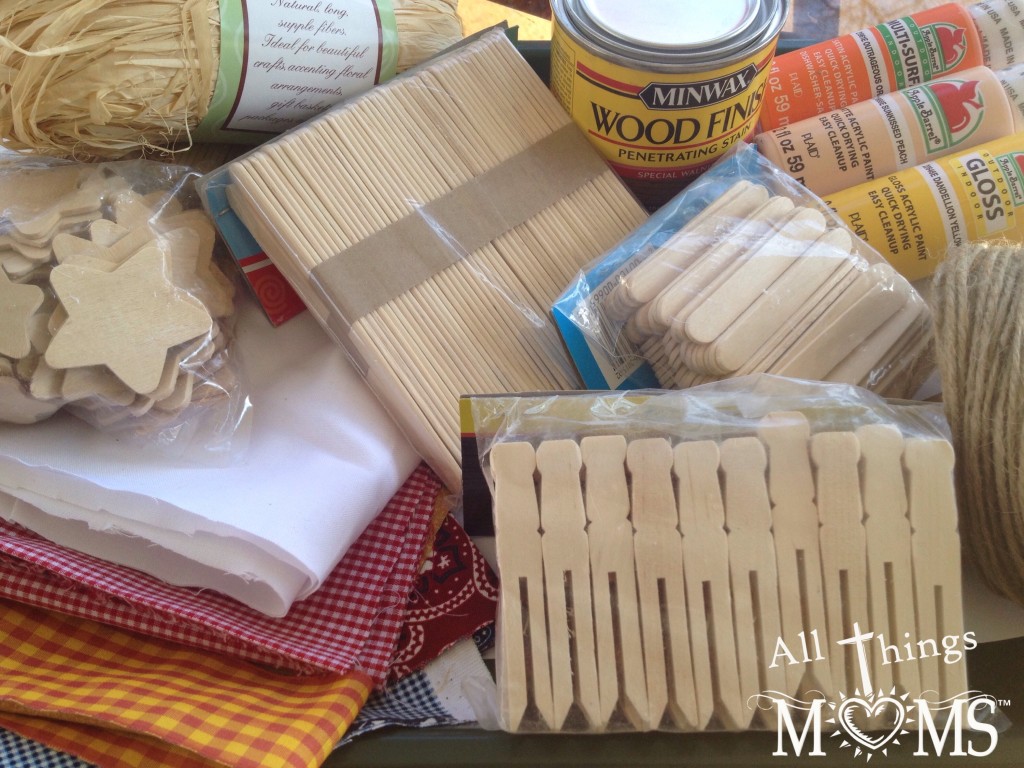
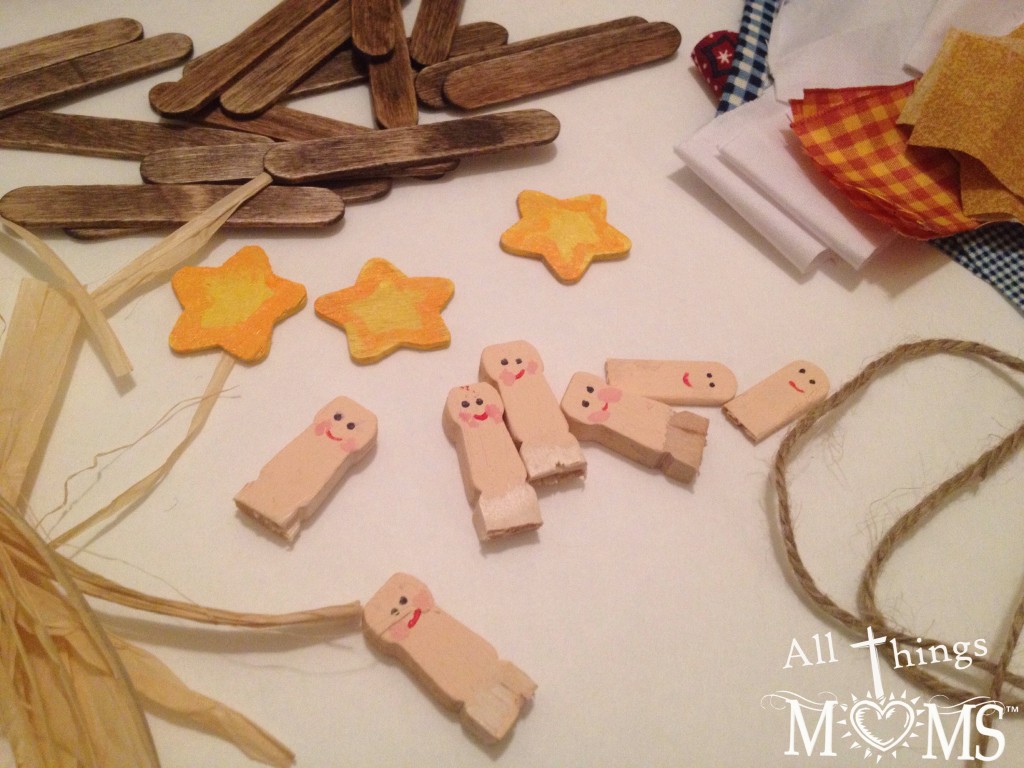
Supplies
– Mini Popsicle Sticks
– Mini Flat Clothespins
– Wooden Stars
– Raffia
– White fabric (1/8 yard or less)
– Multi colored fabrics for clothes. Recommend 3-4 prints or use choose a patchwork fabric with multiple patterns. (1/8 yard total)
– Jute Rope or Yarn
– Wood Stain
– Hot Glue Gun & Glue Sticks
– Acrylic paints – Skin tone, yellow, & red Optional: orange
– Black Sharpie
– Garden Shears
– Fabric scissors
– Paintbrushes of various sizes
*The supplies make more than just one craft, I've included how many of each piece you'll need in the directions so you can determine how many of each supply you may need if doing more than one. I've also linked to the products on Amazon so you can see what they look like but some of them are available cheaper at your local craft store.
Directions:
1. In a well ventilated area, follow the directions on the wood stain to stain the mini popsicle sticks. You'll need to do 10 mini popsicle sticks for each ornament. After wiping the stain, allow the sticks to dry and air out for at least 24 hours.
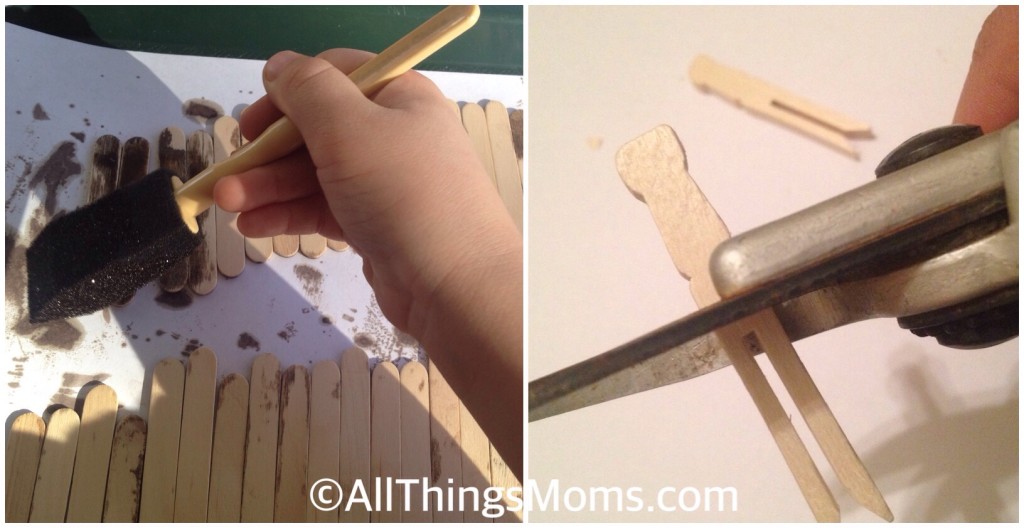
2. Using a sharp set of garden shears, carefully cut the bottoms of the clothespins off. The tops will be the body for Mary and Joseph. You'll need 2 for each nativity ornament you are making.
3. Using garden shears again, Cut 3/4″ to 1″ off of a popsicle stick that has NOT been stained. This will be baby Jesus, you'll need 1 for each ornament. You can get 2 per popsicle stick.
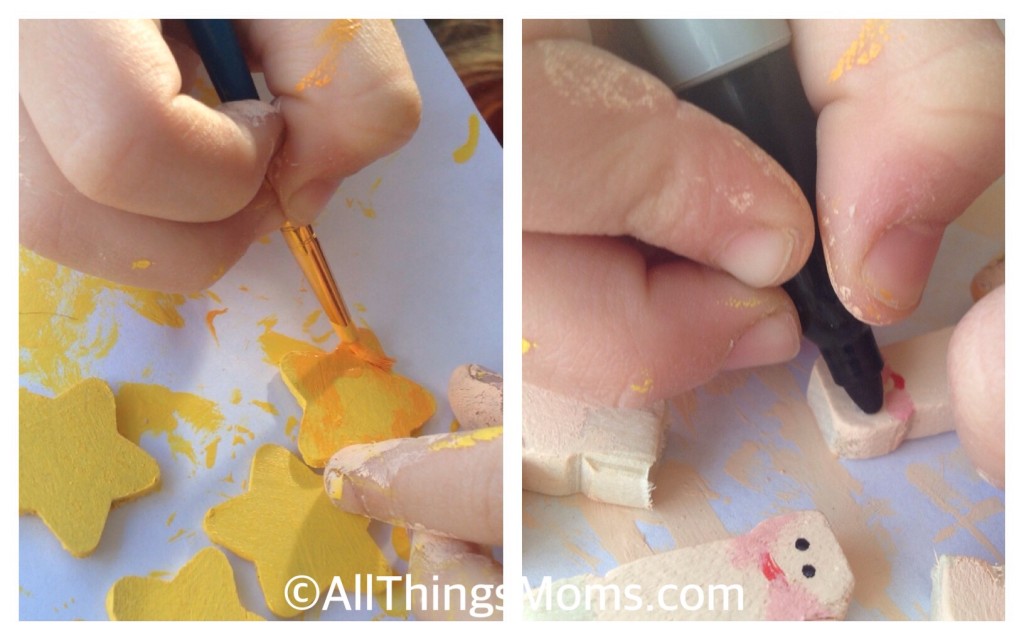
4. Paint the other pieces of the nativity and allow each to dry. (Time may vary depending on type of paint and thickness of application but mine dried within 10 minutes.)
- Stars: Paint the stars yellow.
Optional: Use orange paint to outline the stars. - Mary, Joseph and Baby Jesus (Cut from clothespin and popsicle sticks): Paint these pieces with your skin tone (I used a peach color.)
When dry, Add the details: Mouths can be painted with a fine paint brush and red paint. Combine a little red paint and the skin color to make a pink color to paint on the cheeks. Use a sharpie marker to add eyes.
5. Cut the fabric pieces for the clothes. Make each piece approximately 1″ by 2″. For each ornament, you'll need one white piece and 4 patterned pieces.
6. Cut your twine into 6″-8″ strips. These will be used to hang your ornament from the tree, you'll need one piece for each.
Now you're ready to assemble!! Get your hot glue gun ready!
To assemble your nativity:
1. Lay down 6 mini popsicle sticks in a row. This will be the back of your stable. Glue another mini popsicle stick across the top to hold them together.
2. Next, run a line of glue across the bottom of the stable and set the edge of a mini popsicle stick in it. This is the floor of your stable.
3. For the roof, put a drop of glue on the top corners of your stable. Attach a mini popsicle stick to each at an angle so they connect to make a roof. Add a drop of glue where they connect to hold them together.
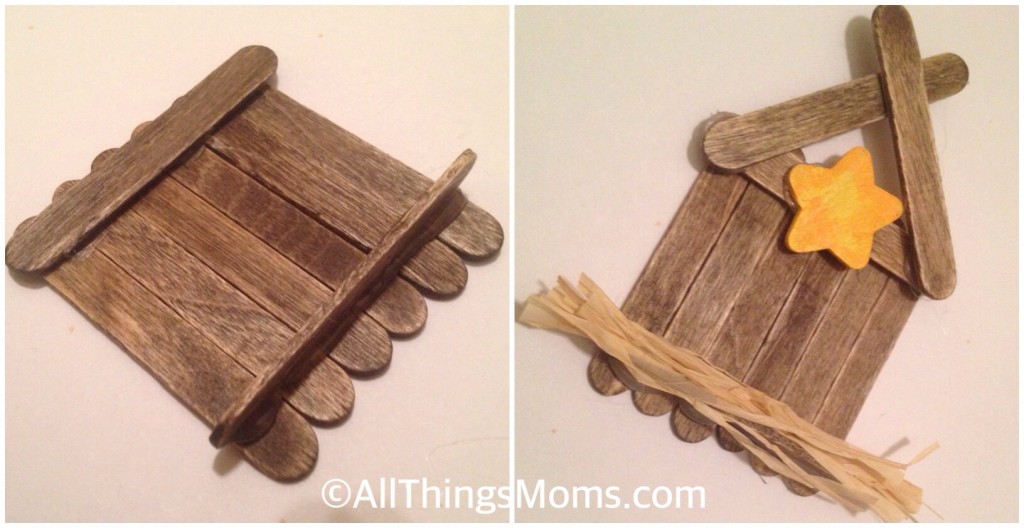
4. Put glue on the stable floor and attach press in some raffia for hay.
5. Hot glue a star in the top of your stable.
6. Wrap baby Jesus in His swaddling clothes by taking a piece of the cut white fabric and wrapping it around him. Make sure to put some glue on his body first so the clothes will stick. Once wrapped, fold the bottom up behind him and glue. (See the video below)
7. Dress Mary and Joseph by wrapping their body with a piece of cut fabric. Prior to wrapping, fold the fabric over so it is the right length. You want it to be just a little bit longer than their body, but not too much. Fold another piece of fabric in half and attach their head covering by gluing to the top and sides of their heads. (See the video below)
8. Glue Baby Jesus in the middle of your stable. Add Mary and Joseph to either side. To do this, run a line of glue along their backs and press down onto your stable.
9. Flip your ornament over and attach a piece of baling twine to the roof to hang the ornament on the tree.
That's it, your nativity is ready to go on your Christmas tree!
Note: These ornaments were inspired by a craft kit I purchased in 2003 that is no longer available.
Hi! I'm Paula, a wife and mom by both, birth and adoption. We are a homeschool family and are also therapeutic foster parents. I enjoy spending time with our horses, gardening or going on adventures (usually in our backyard) with my family. We love Jesus and strive to honor Him in all we do. Want to know why I started All Things Moms? >>Read More
Clothes Pin Mary Joseph and Baby Jesus Ornament
Source: http://allthingsmoms.com/nativity-ornament/
0 Response to "Clothes Pin Mary Joseph and Baby Jesus Ornament"
Enregistrer un commentaire